
A Home Rewire Project Example, Step by Step
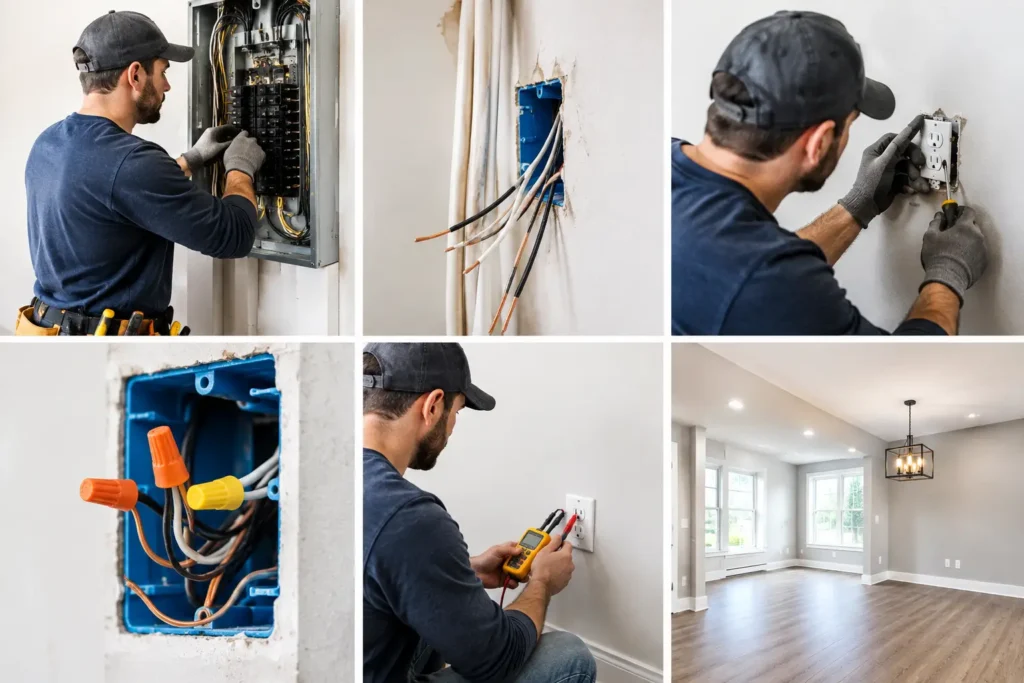
A home rewire project example is often more useful than a technical checklist. Homeowners want to know what actually happens: whether they can stay in the property, how much mess to expect, when the power will be off, and what they will have once the work is finished. The answer depends on the age and layout of the home, but a typical project follows a clear, manageable process when it is planned properly.
This example looks at a three-bedroom 1960s semi-detached house in Kent that was being updated before a family moved in. The existing installation had dated wiring, limited socket outlets, an old-style consumer unit and no suitable provision for modern kitchen appliances, bathroom extraction or garden lighting. It was still working in places, but that is not the same as being suitable for current use or providing the level of protection a modern installation should offer.
When a full rewire is the sensible option
A rewire is not automatically required because a property is old. An electrical inspection and a visual assessment should come first. In some homes, targeted repairs, a new consumer unit or additional circuits may be enough. In others, ageing cable insulation, poor previous alterations, lack of earthing, repeated faults or insufficient circuits make a full rewire the safer long-term choice.
In this case, the homeowner had already planned plastering, decorating and a new kitchen. That made the timing practical. A rewire involves lifting selected floorboards and carefully chasing walls to install new cabling, so it is far less disruptive before final finishes, fitted furniture and new flooring are in place.
The initial survey was used to discuss how the family would use each room, rather than simply replacing what was already there. The kitchen needed dedicated supplies for the oven, hob, dishwasher and washing machine. Bedrooms needed more accessible sockets for bedside lamps, chargers and home working. The bathroom required a suitable extraction fan, while the outside space needed lighting that could be controlled safely from inside the house.
Home rewire project example: planning the new layout
Before work began, the electrician produced a clear quotation based on the agreed scope. This covered the replacement wiring, a modern consumer unit, new sockets and switches, lighting points, smoke alarms, bathroom fan wiring and the necessary testing on completion. It also set out what was included and what would need to be arranged separately, such as final plaster repairs and redecorating.
This stage is where small decisions make a big difference. The owners chose additional double sockets in the lounge and bedrooms, rather than relying on extension leads. They placed kitchen sockets around the planned worktop layout, added a switched supply for the extractor hood and included a socket near the hallway cupboard for a vacuum cleaner. They also opted for LED downlights in the kitchen and a pendant fitting over the dining table.
Not every preference should be treated as a fixed rule. More sockets are usually useful, but they need to be positioned sensibly around furniture, radiators and door openings. Downlights give a clean finish, but too many can make a room feel harsh and add unnecessary cost. A good survey balances convenience, appearance, budget and safe installation requirements.
Preparing the property
For this project, the family chose to move in after the main electrical work and decoration were complete. An empty property is the quickest and least stressful setting for a full rewire, although occupied rewires can be organised in stages where necessary.
Before the start date, carpets were lifted where access was required, furniture was removed or moved away from working areas, and the kitchen fitters confirmed their appliance positions. Dust sheets and floor protection were used, but homeowners should expect some dust and disturbed finishes whenever walls are chased. Neat work reduces the impact; it cannot remove the need for making good afterwards.
The electrical supply remained available where possible, but there were planned periods without power while the old circuits were disconnected and the new consumer unit was installed. Clear communication matters here. Knowing when the cooker, Wi-Fi, lighting or heating controls may be unavailable allows a household to prepare rather than be caught out.
First fix: installing the new wiring
The first fix is the part most people picture when they think of rewiring. Old redundant cables were made safe and new routes were installed from the consumer unit to each circuit. Cables were run beneath accessible floors, within walls and through suitable routes to the planned socket, switch and lighting positions.
The new installation included separate circuits for upstairs and downstairs sockets, lighting circuits, kitchen appliances, smoke alarms and the bathroom fan. Separating circuits in this way helps with safe fault protection and avoids one small issue taking out every electrical item in the house. The exact circuit arrangement always depends on the property and its electrical load.
New back boxes were fitted for sockets and switches, and wiring was left ready for the kitchen and bathroom work. At this stage, there were no finished white fittings on the walls yet. The priority was sound cable routes, secure connections and a layout that would work properly once the rooms were completed.
The homeowner also decided to add external wall lights at the front and rear of the house. Adding this during a rewire was more economical and tidier than returning later to run separate cabling across finished surfaces. It is a good example of why discussing future plans at the survey stage is worthwhile.
Making good and second fix
Once the first fix was complete, the walls were ready for plastering and the kitchen installation could move forward. The electrician returned after these trades had finished to complete the second fix. This included fitting sockets, switches, light fittings, bathroom accessories, smoke alarms and the consumer unit cover.
The kitchen appliances were connected at the appropriate point in the fitting schedule. Care was taken not to install sockets where they would be hidden behind fixed appliances or inaccessible after the kitchen was complete. In the bathroom, the extractor fan was fitted and tested so it continued to run for an appropriate period after the light was switched off, helping to control condensation.
This is also the point where the home begins to look finished again. New white accessories, correctly positioned lights and a tidy consumer unit make a noticeable difference, but the real value is in the safety and capacity of the wiring behind them.
Testing, certification and handover
No rewire should end when the last socket front is fitted. Every relevant circuit needs to be inspected and tested before it is put into service. Testing checks items such as earthing, protective devices, polarity, insulation resistance and the operation of safety devices at the consumer unit.
Any issues found during testing must be resolved before completion. Once the installation passed, the homeowner received the appropriate electrical certification and the new circuits at the consumer unit were clearly labelled. The electrician also explained how to isolate the supply if needed, which breaker controlled each area, and why repeatedly resetting a tripping device without finding the cause is never a sensible solution.
For landlords, property managers and homeowners planning to sell, keeping this paperwork safely filed is particularly helpful. It provides a clear record of the work completed and supports future inspection, maintenance or alterations.
How long does a home rewire take?
For this three-bedroom example, the electrical work took around seven working days across the first and second fix visits, with a gap for plastering and kitchen work. A smaller flat may take less time, while a larger occupied property, an extension, difficult access or more complex lighting and heating controls can take longer.
The biggest influence is often coordination. A rewire is easier when the electrician, plasterer, kitchen fitter, decorator and homeowner agree the sequence before work starts. Rushing one trade to accommodate another can create avoidable delays, damaged finishes or awkward compromises.
A full rewire is disruptive, but it is also an opportunity to make a home safer and much easier to live in. For homeowners in Tonbridge and across Kent, Eldred Electrical Services can assess the condition of an installation, explain the options in plain language and provide a free, no-obligation quotation. If you are planning renovation work, arrange the electrical survey early so the wiring can support the home you are creating, not the one it used to be.


